Migrating a website to mybox means copying your files, database, and email content from your current hosting provider and pointing your domain to mybox servers. There are two ways to do this: using the Website Migration add-on (recommended) or performing the migration manually.
→ How to order a website migration in early access
Manual migration - step by step
Use this path if you want to migrate your website yourself. Before starting, make sure you have FTP access and a database export from your current hosting provider.
Before you begin
- Back up your files - download all website files from your current hosting via FTP to your local computer
- Export your database - if your website uses a database (WordPress, Joomla, etc.), export it as a .sql file using phpMyAdmin or a similar tool at your current provider
- Disable new content - if migrating a blog or online store, temporarily disable comments and orders to avoid data loss during the transfer
Step 1 - Park your domain

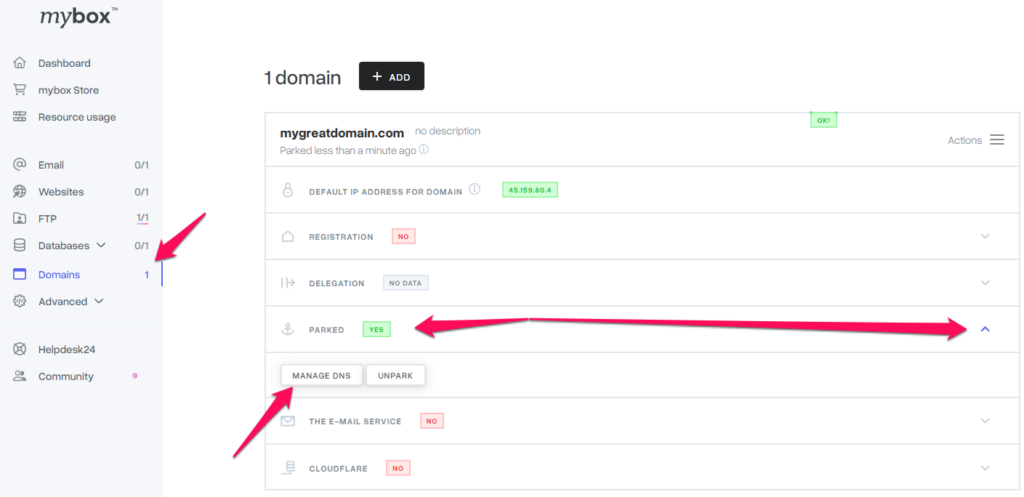
Log in to the mybox panel and go to Domains → Add → Park domain. Enter your domain name and click Park domain.
This registers the domain in your account so you can create a website and prepare files before changing DNS.
Step 2 - Create a website
Go to Websites → Add and select Empty website. After specifying the domain address, the website will be created. Click Show access data to save your FTP credentials and MySQL database details - you will need these in the next steps.
Step 3 - Upload website files via FTP
Use an FTP client such as FileZilla to connect to your mybox account using the credentials from Step 2. Upload all website files to the public_html directory.
Step 4 - Update database connection details
Before importing the database, update the connection settings in your website’s configuration file. For WordPress, this is wp-config.php. Replace the old database name, username, password, and host with the values shown in Show access data.
Step 5 - Import the database
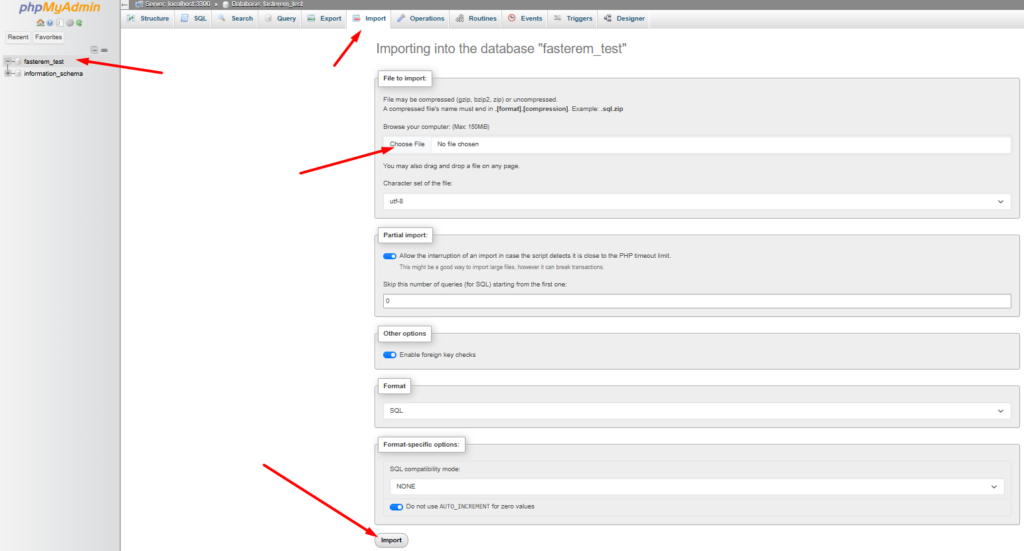
Open phpMyAdmin via Databases → MySQL Databases in the mybox panel. Log in with your database credentials, select your database on the left, then go to Import. Select your .sql file and click Go.
Step 6 - Test the website before changing DNS
Before updating nameservers, verify the website works correctly on mybox servers by temporarily modifying your local hosts file. This lets your browser resolve the domain to the mybox IP address without affecting live visitors.
→ How to test your website on mybox before changing DNS
Step 7 - Update nameservers
Once you confirm the website is working correctly, go to your domain registrar’s panel and update the nameservers to:
- ns1.mybox.com
- ns2.mybox.com
DNS propagation can take up to 24 hours. During this time the website may be served from the old or new hosting depending on the visitor’s location - this is expected behavior.
Optional: update the A record first
To minimize downtime, you can update the A record at your current provider before changing nameservers. Set it to the IP address shown in Domains → Manage DNS in the mybox panel, and set the lowest possible TTL value. This allows the DNS change to propagate faster.