


This article explains how to add a website to your mybox account. There are two paths: using the auto-installer to set up a CMS (recommended for most users), or creating a blank website for manual setup.
Table of Contents
Before you start - domain requirement
To create a website, you need a domain parked in the mybox panel. A parked domain can be one you registered elsewhere and pointed to mybox nameservers, or a free mybox subdomain.

→ How to park a domain in mybox
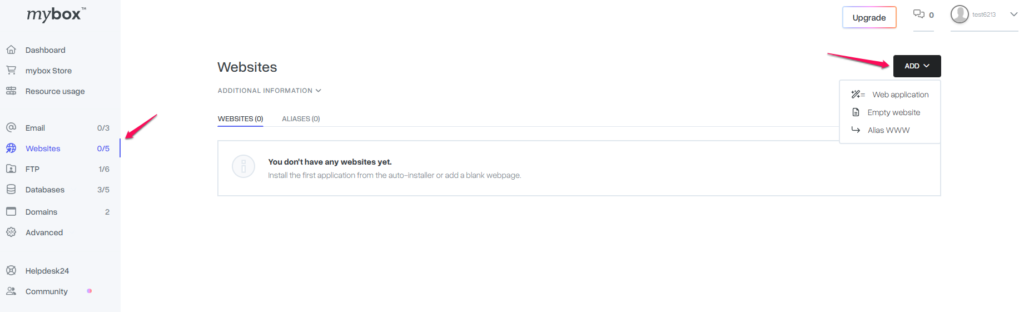
Once a domain is parked, go to Websites → Add to start creating your website. You will see two options: Web Application (auto-installer) and Blank Website.
Option 1 - Web Application (auto-installer)
Use this option to install a CMS automatically. mybox handles the installation and provides access credentials when it’s complete.
1. Go to Websites → Add → Web Application.
2. Enter a name for the site, select the application you want to install, and accept the licence agreement. Click Add Page to start the installation.

3. The installation status updates automatically every few seconds. Leave the panel open to monitor progress. You will also receive an email notification when installation is complete.

4. Once complete, click Show Access Data to view your login credentials, FTP details, and database information. This data can also be downloaded as a PDF.
Access data passwords are visible for 3 days, after which they are hidden. Save them immediately or download the PDF.


If you closed the status window, access data is always available under Websites → Actions → Access Data for the relevant site.

WordPress installations include the AI Website Builder powered by Extendify - a guided setup that helps you build a complete site in a few minutes without any coding.
Blank web page
Option 2 - Blank Website
Use this option if you want to upload files manually or install an application that is not available in the auto-installer.1. Go to Websites → Add → Blank Website.

2. Enter a name for the site. By default, mybox creates a directory structure based on this name, including a public_html folder where your website files should be placed.
3. Configure the following optional settings:
| Setting | What it does |
| Web Account Directory | Custom directory name (leave default unless you have a specific reason to change it) |
| public_html directory | Choose an existing directory or create a new one |
| PHP version | Select the PHP version required by your application |
| Wildcard | Redirects traffic from undefined subdomains to this website |
| FTP account | Creates a dedicated FTP account scoped to this website’s directory |
| MySQL database | Creates a database linked to this website |
4. Click Add Website. Once the setup is complete, click Show Access Data to view FTP and database credentials.