


In mybox webmail, you can create filters that automatically forward incoming emails to another mailbox and remove them from the original inbox afterward. This is useful when you want to centralize email processing in a different account without keeping duplicates.
This configuration is done directly in the webmail interface.
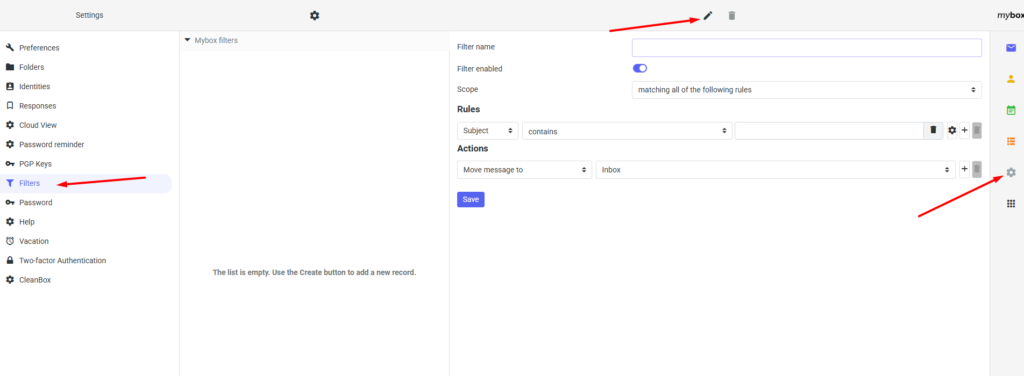
Table of Contents
How to create a forwarding filter with deletion
1. Open webmail settings

Log in to your webmail account and go to:
Settings
2. Open filters
In the settings menu, select:
Filters
3. Create a new filter
Click:
Add new filter
Then enter a clear and descriptive name for the filter.
4. Define the rule
Set the condition for incoming messages.
For example:
If the message is sent to a specific mailbox (e.g. your address), apply the rule.
5. Set forwarding action
Choose the action:
Forward message to
Then enter the destination email address where messages should be delivered.
You can forward to:
- another internal mailbox
- an external email address
6. Add deletion action
Add another condition or action using the plus option.
Select:
Delete message after forwarding
This ensures the message is removed from the original mailbox once it has been successfully forwarded.
7. Save the filter
Confirm and save the configuration.
The filter becomes active immediately.
Practical implications
- messages are forwarded automatically in real time
- original mailbox does not store copies of forwarded emails
- filters can be customized per sender, recipient, or subject
- useful for routing mail to centralized systems or external tools
Summary
In mybox webmail, forwarding with deletion is configured through filters in the settings menu. By combining a forwarding rule with a delete action, incoming messages can be automatically redirected and removed from the original mailbox.