


When your eCommerce website is based on the “PrestaShop” CMS, you can easily configure the sending of notification emails for both you and your customers using the email box you have created for this purpose via the SMTP protocol.
Instructions on how to add a new email can be found in our guide available HERE.
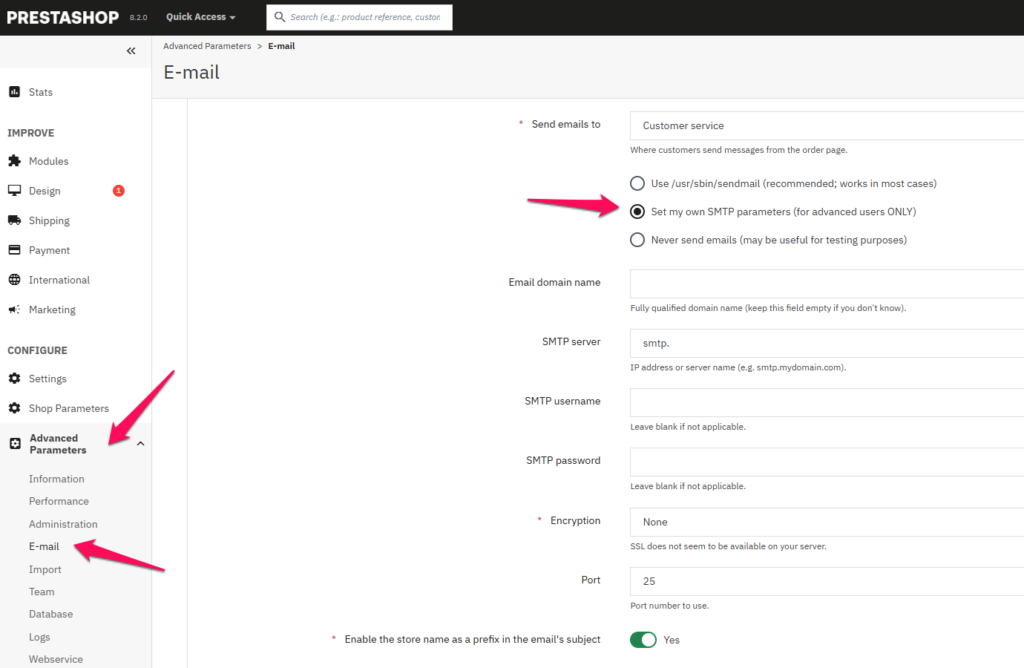

1. Once you have the mailbox you want to configure, log in to the “PrestaShop” backend and then select the “Email” option from the menu on the left, located in the section: “Configuration / Advanced”
2. On the page that appears, you will find a frame called “Email” (with an envelope icon) where you should indicate that you want to use your own SMTP settings and click the “Save” button
3. Then, a little lower in the box called “E-mail” (with a gear icon), enter the access data to the mailbox, so in order:
- Leave the “Email domain name” field blank
- In the “SMTP server” field, enter the value: smtp.mybox.com
- In the “SMTP username” field, enter the full name of the mailbox you created to use it to send notifications from the site.
In our example, it is: [email protected] - In the “SMTP password” field, enter the password you defined when setting up your email box
- Set “Encryption” to TLS
- In the “Port” field, enter the value: 587
Click the “Save” button to save the settings you have made.
4. At this stage, you can do the sending test. If the data has been entered correctly and there are no other irregularities, you will receive a message that the message has been sent.
I’m getting an error message
If you receive a message like the screenshot below while running the test, it means that you need to correct your email address on the contact information settings page.
1. In the ” PrestaShop” back-end menu, go to “Contact” in the left-hand menu, in the “Configure / Preferences” section.
2. The first tab – “Contacts” – on the page that loads, will allow you to set the data of individual contacts, i.e. Webmaster and Customer Service. You can edit by clicking on the pencil icon located to the right of each item.
3. Then, under the “Stores” tab, modify the value of the “Email Address” field and save the changes by clicking the “Save” button.
Go back to the mailbox settings page in the “PrestaShop” backend to repeat the test.