


To set up a calendar using CalDAV in Outlook, you need to install an additional application available for free download HERE.
Then make sure that you have activated the appropriate option on the mail.mybox.com side according to the guide available HERE.
When the application starts, click CalDav Synchronizer, then click Synchronization Profiles.
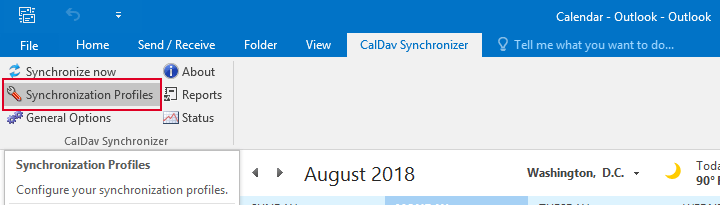

In the pane that appears, select Add new profile.

Select Generic CalDAV/CardDAV.

Then enter the CalDAV calendar data obtained during the setup described HERE.

Then , click on “Show Advanced Settings” located at the bottom of the settings pane

This will bring up additional “Network Settings” options. Make sure that only the Use preemptive authentication option is selected. Click OK to save your changes and complete the setup step.

In some cases, when the app can’t connect, you need to use an alternate address

The sync status should look like this

Table of Contents
Alternative CalDAV Address
In some environments, Outlook may fail to connect using the primary CalDAV address.
If synchronization does not work:
- Verify the CalDAV URL.
- Try the alternative CalDAV address provided in your calendar configuration.
- Save the profile and test synchronization again.
Verifying Synchronization
Once the profile has been created successfully:
- Start a manual synchronization.
- Wait for Outlook to complete the process.
- Check that calendar events appear correctly.
A successful synchronization status should indicate that:
- Authentication succeeded
- Calendar data was retrieved
- No synchronization errors occurred
Troubleshooting
If synchronization fails:
Confirm that firewalls or antivirus software are not blocking Outlook.
Verify the username is your full email address.
Confirm the mailbox password is correct.
Check that CalDAV access is enabled.
Verify the CalDAV URL.
Ensure Use Preemptive Authentication is enabled.