


OpenCart is a popular open-source e-commerce platform that allows you to create and manage an online store. Since OpenCart is not available as an automatic installer in the mybox Panel, it must be installed manually.
This guide walks you through the entire installation process.
Table of Contents
Before You Begin

Before installing OpenCart, you should:
- Have a domain or website added in the mybox Panel.
- Create a blank website.
- Have access to FTP.
- Have access to a MySQL database.
Step 1: Create a Blank Website
- Log in to the mybox Panel.
- Navigate to:
Websites
- Click:
+ Add
- Select:
Blank Website
- Complete the form and create the website.
After the website is created, save the information displayed by the system, especially:
- Database name
- Database username
- Database password
- FTP account details
You will need these during installation.
Step 2: Download OpenCart
Visit the official OpenCart download page:
Download the latest stable version of OpenCart.
After downloading:
- Extract the ZIP archive on your computer.
- Locate the installation files.
Step 3: Upload the Files
Connect to your hosting account using FTP.
You can use applications such as:
- WinSCP
- FileZilla
- Cyberduck
Upload the OpenCart files to your website’s root directory.
By default, this is:
public_html
Step 4: Rename Configuration Files
Before starting the installer, OpenCart requires two configuration files to be renamed.
Root Directory
Locate:
config-dist.php
Rename it to:
config.php
Admin Directory
Navigate to:
public_html/admin
Locate:
config-dist.php
Rename it to:
config.php
Step 5: Start the Installer
Open your web browser and visit your website address:
https://yourdomain.com
The OpenCart installation wizard should launch automatically.
Step 6: Accept the License Agreement
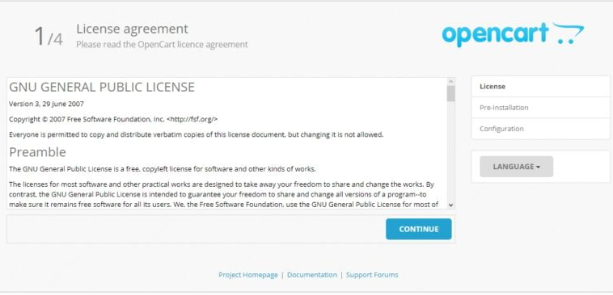
The first screen displays the OpenCart license agreement.
Read the information and click:
Continue
or
Next
depending on the installer version.
Step 7: Server Compatibility Check

OpenCart will verify:
- PHP version compatibility
- Required PHP extensions
- File permissions
- Configuration files
If all requirements are met, proceed by clicking:
Continue
Step 8: Configure the Database

On the database configuration page, enter the database credentials you received when creating the website.
Typical fields include:
Database Driver
MySQLi
Database Host
localhost
Database Name
Enter the database name provided by the mybox Panel.
Username
Enter the database username.
Password
Enter the database password.
Database Port
3306
Table Prefix
The default value is usually:
oc_
You may leave this unchanged unless you have a specific reason to modify it.
Tip
When copying credentials, ensure that no extra spaces are added before or after the values.
After completing the form, click:
Continue
Step 9: Create the Administrator Account
Enter the details for your OpenCart administrator account:
Username
Example:
admin
Password
Choose a strong password.
Email Address
Enter an email address that you actively use.
Click:
Continue
to complete the installation.

Step 10: Remove the Installation Directory
After installation is complete, OpenCart will display a security warning requesting that you remove the installer files.
Using FTP, delete the directory:
public_html/install
Removing this directory is required for security reasons and prevents unauthorized reinstallation of your store.
Verify the Installation
After deleting the installation directory:
Store Frontend
Visit:
https://yourdomain.com
Administration Panel
Visit:
https://yourdomain.com/admin
Log in using the administrator credentials created during installation.
Summary
To install OpenCart:
- Create a blank website in the mybox Panel.
- Download OpenCart from the official website.
- Upload the files to
public_html. - Rename both
config-dist.phpfiles toconfig.php. - Launch the installer in your browser.
- Enter the database credentials.
- Create the administrator account.
- Complete the installation.
- Delete the
installdirectory.
Your OpenCart store is now ready for configuration, product management, and further customization.